There are a few approaches you can take to backup your Windows system. You can use a tool like SyncToy to schedule the backup of the most important folders on your system. Or you can choose from a list of free system cloning apps to take a full backup of your entire Windows system. In this article, you’ll learn how to use one of those tools – EaseUS – to set up an automatic backup system for Windows with a smart backup schedule that won’t interfere with your computer use.
Setting Up An EaseUS Automatic Backup System
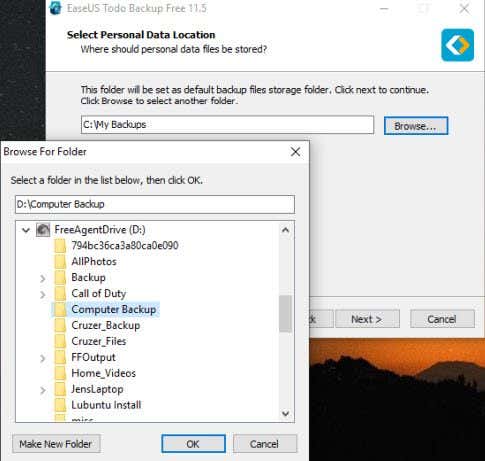
When you first install EaseUS, it’ll ask you to choose a setup folder where all of the backup files will be stored.Browse to a backup folder on an external hard drive where you’ll be keeping your backups. Create a new backup folder if you need to.
Select OK and then Next when you’re done. The installation program will complete the EaseUS installation.
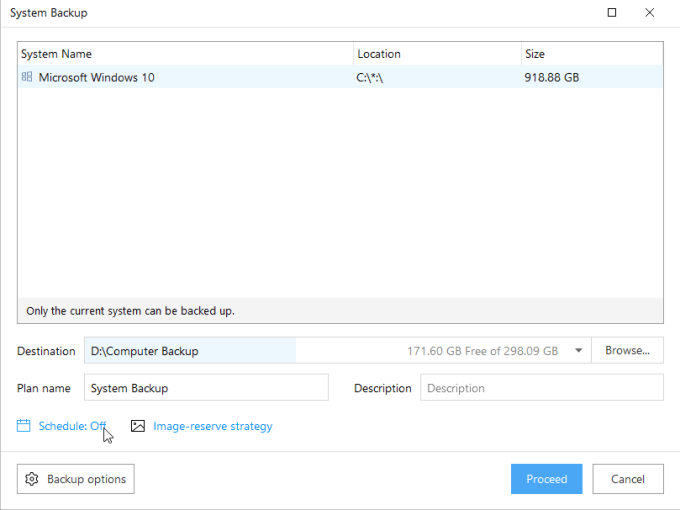
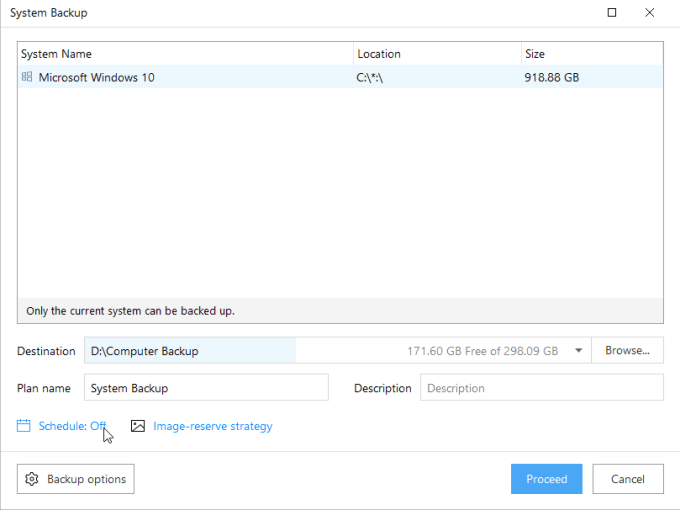
There are two parts to setting up a good automatic backup system for Windows. The first is configuring what gets backed up, and the second is scheduling the backups for when it’ll have the lowest impact. To set up the backup of your Windows system, select the System Backup button on the main screen. This will launch another window where you can select what you want to back up. If you have more than one OS installed, you’ll see them here. You could select the Windows OS and just proceed, but it’s better to optimize your backup to save space and reduce the backup time.
Optimizing System Backups
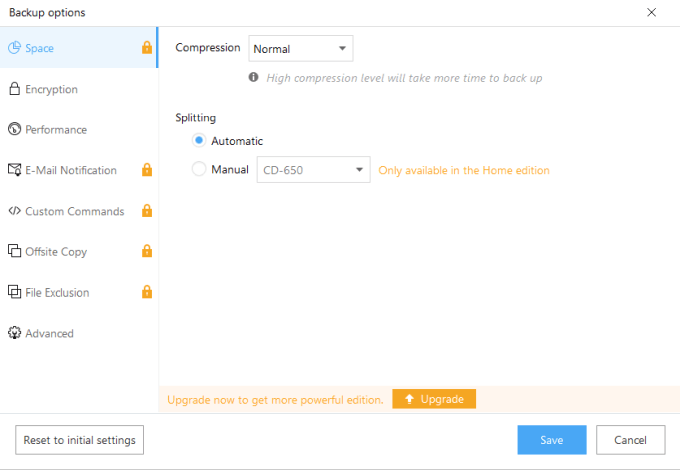
Select Backup options to optimize your backup procedure.Select Space from the left navigation menu. If you’ve purchased the paid edition of EaseUS, you can change the Compression setting to High to save space. If you’re using the free version you’ll need to keep this set to Normal.
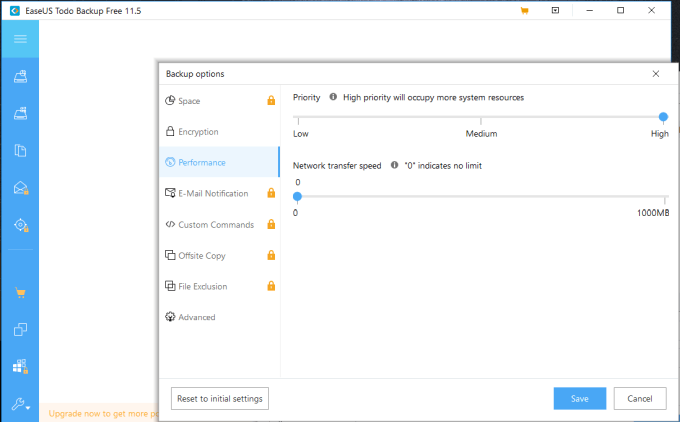
Select Performance from the navigation menu, and slide the Priority slider to High.
This will ensure all system resources are dedicated to taking the backup. While this might be an issue if you were trying to use your computer, you’re going to schedule the backups to take place during a time when all system resources will be available for it.
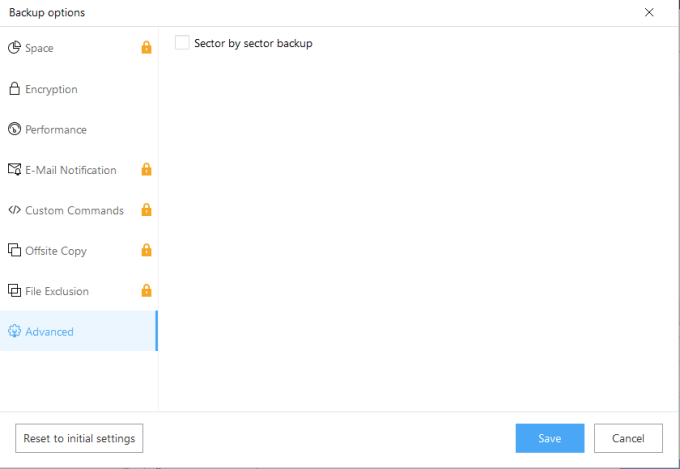
Select Advanced from the navigation menu, and make sure Sector by sector backup is not enabled.
A sector by sector backup would copy every sector, including those that don’t store any important information. By not selecting this, it’ll save space and make your automatic backup more efficient.
Select Save to finish.
Schedule Your Backup To Daily
To ensure that you have a fresh update of all system changes that occur every day, you’ll want to make sure backups happen every day.
On the System Backup screen, select the Schedule: Off link.
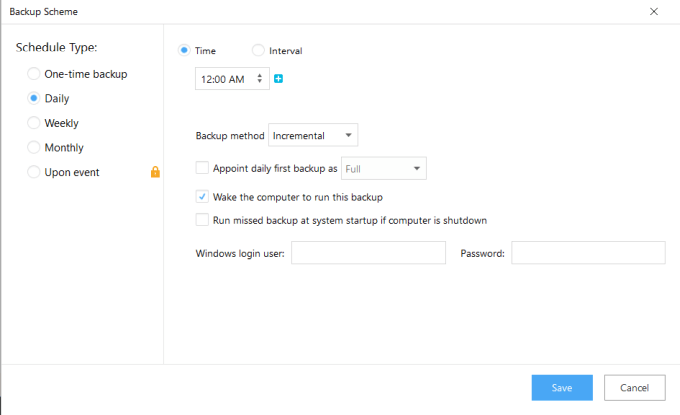
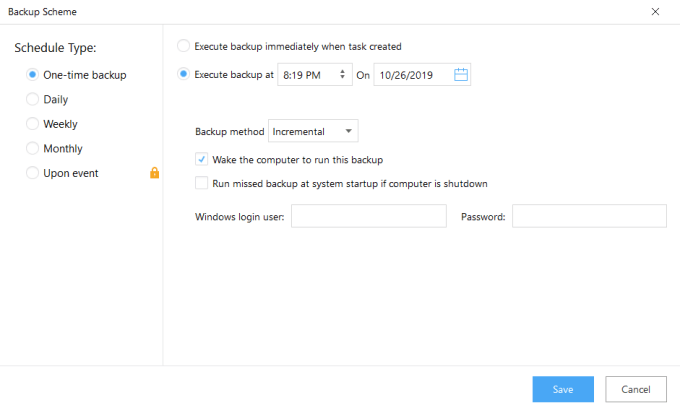
In the Backup Scheme window, change the Schedule Type to Daily. Next, make sure the time is set to 12:00 AM, or any other time of day when you aren’t likely to be using your computer.Set the Backup method to Incremental. This will reduce the amount of time that backups take every day, since only folders and files that have changed will be backed up each day.Make sure Wake the computer to run this backup is enabled, and disable Run missed backup at system startup if computer is shutdown.
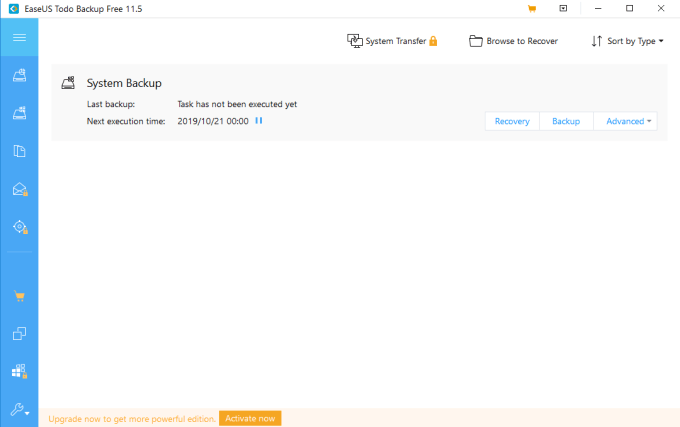
This will ensure that even if the computer has gone to sleep, it’ll wake up to initiate the backup as required. By disabling the missed backup option, it’ll keep the backup from consuming all system resources once you get back on your computer the next day. Once you’re done, on the System Backup window select Save to finish. Now you’ll see the backups you’ve scheduled listed in the main window. By scheduling the backup after hours, they can take place when it won’t impact your computer use in any way.
Create a Cloud-Based Automatic Backup System
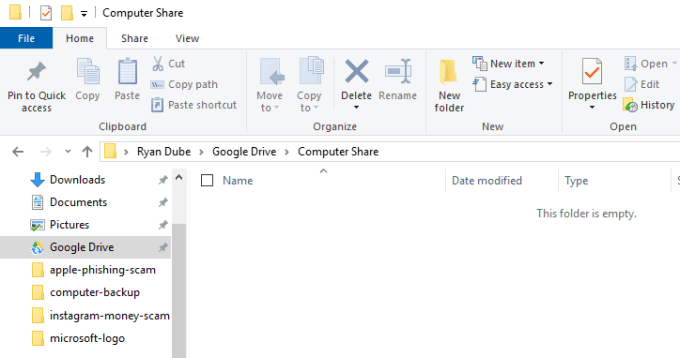
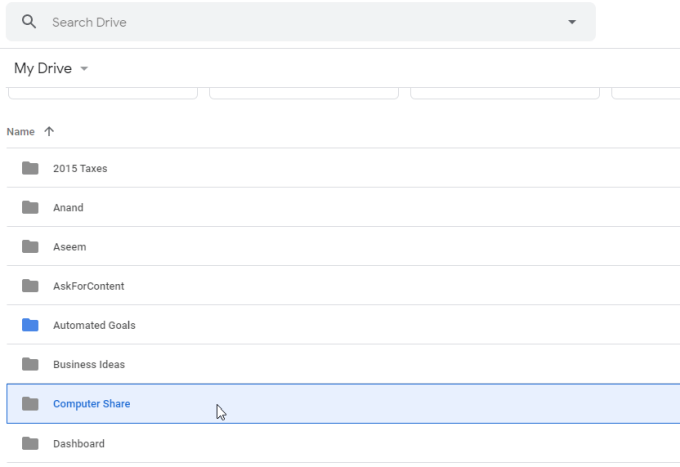
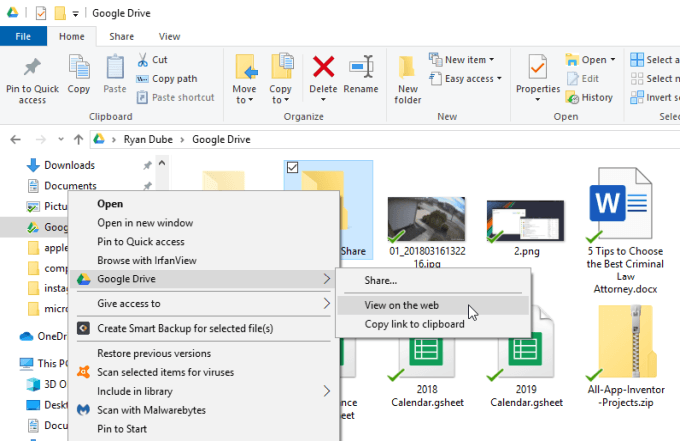
If you really only care about a set of important files or folders on your system, then syncing a folder on your PC to be backed up to the cloud is the best way to go. One of the best tools for doing this is Google Drive Sync. Once you install Google Drive on your PC, you’ll see a new drive show up in Windows Explorer called Google Drive. Anything you place in this Google Drive will automatically get synced with your Google Drive account. To keep your backup organized, create a new folder in your Google Drive directory called Computer Share. Now you can copy all of the important files or folders on your PC into this Computer Share directory. Everything you move there, you’ll see show up in your Google Drive account. As you create new folders in your new Google Drive shared drive, you can open them directly on the web by right-clicking the folder on your computer and selecting Google Drive, and View on the web. This will open your browser and take you directly to the drive so you don’t have to search for the drive online. Once you’ve established this synced link between Google Drive and your PC, start copying all of your important files and folders into the new shared drive. Move them all inside the Computer Share folder you’ve created.
Protect Your Backups From Viruses
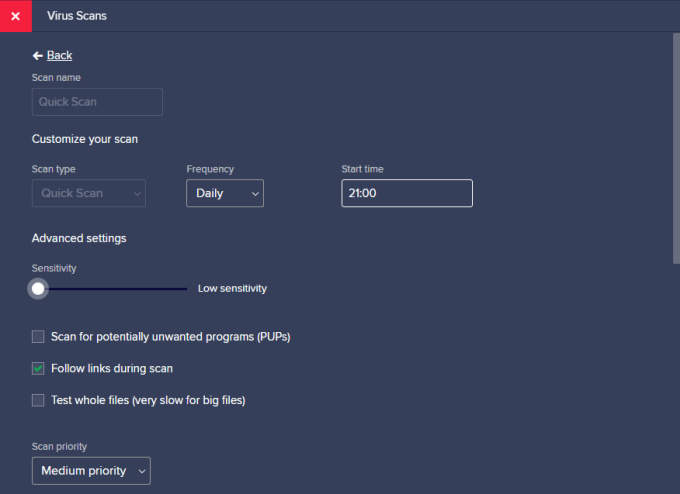
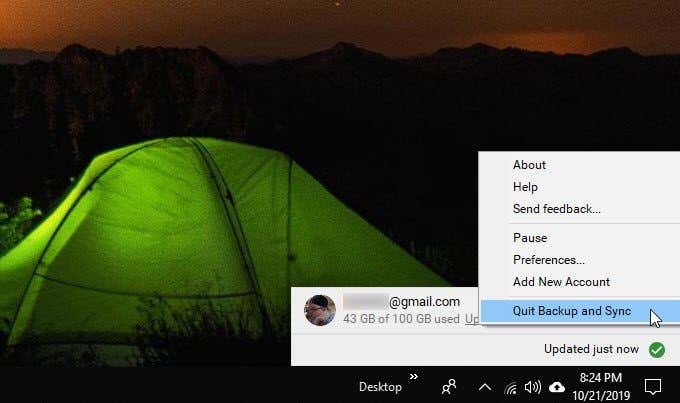
Having a backup is fantastic, but having your automatic backup system copy over infected files isn’t. This is why when you’re done setting up your backup system, you should also invest time in setting up a daily virus scan as well. At least set up Windows Defender for automatic scans. However, installing full antivirus software is even better. There are lots of free antivirus options. In your antivirus software, make sure to configure the virus scans to run daily. Set the scan time to when you’ll be on your computer. The reason for this is so that when the antivirus software identifies the virus, you need to act fast to protect your backups. In the case of backup software, immediately disable the scheduled backup to the one-time backup or manual option. In the case of a cloud solution, like Google Drive, just right-click the sync icon in the Windows taskbar and disable the sync process. This will give you time to resolve the virus or malware infection without impacting your backups. By scheduling your antivirus scans either when your computer system boots up, or during your work time, and scheduling backups only after you’re done for the day, you’ll reduce the risk of infections ever impacting your automatic backups. Once you’ve finished cleaning up your system of the infection, just re-enable the backup schedule, or the cloud sync connection.
